In the Shed's Boat Shed.
- Yambo
- Posts: 2470
- Joined: Mon Mar 16, 2020 8:08 pm
- Location: Self Isolating
- Has thanked: 598 times
- Been thanked: 1647 times
In the Shed's Boat Shed.
Most of the shed stuff I do nowadays is boat related, I live 2 minutes walk from the beach and the Mediterranean so boats win out.
I still get asked to fettle cars and scooters now and again, I still have all my tools but mechanical work is cheap here so most people get things done in town. There is always work to do when you own a boat and I own 4 so there is always work to do. Winter is the busiest time of course because the boats are out of the water and all the ideas that have sprung to mind during the summer, to make them better, can be tackled. They also need to be looked after. Three of my boats are wooden (plywood and fibreglass) and they'll start to look tatty after a busy summer so they get a going over.
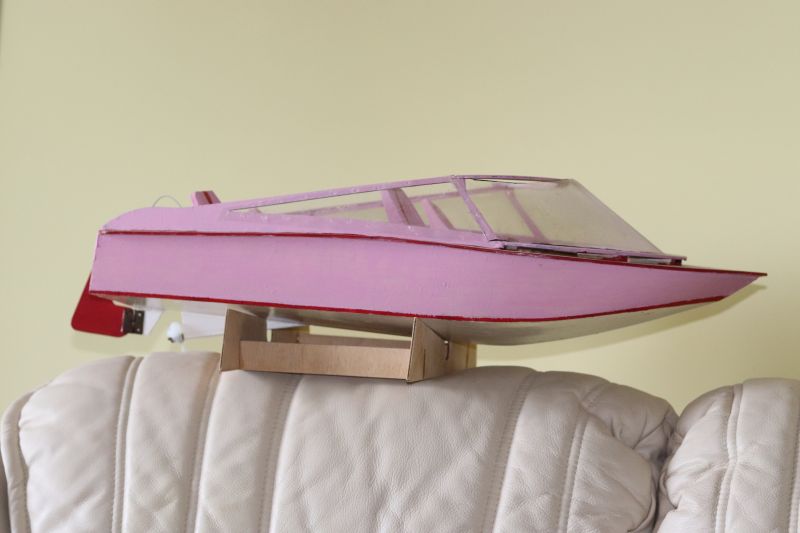
I also like making model boats and I currently have 4 on the go. The best thing about the models is that you can put them down for a while and come back to them when there's more time for hobbies. So, I thought I'd document some of the bits and pieces that I do so that you can see that ex-pat life isn't all beer and swimming pools. Here's a couple of finished boats that I made for my grandkids. Most of the models I make though are given away.
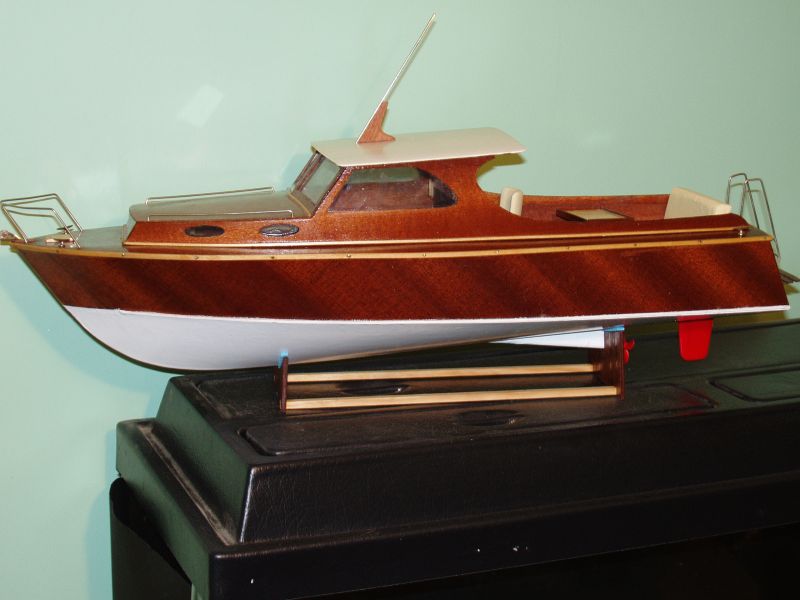
The pink boat is scaled to fit a Barbie doll and my grandaughter usually brings 3 or 4 of them with her when the family come on holiday and gives them trips round the pool.
Current projects are some work on my big boat (although I'm under house arrest so I can't get up to where it's standing to do what I need to do), making new kitchen cupboards and a hard roof over the back end; a bit of re-furb work on the trimaran and 2 RC model boats for friends. I've been making bulkheads for those today and will make some more tomorrow when I'll start taking some pictures. I also sanded the rear aka off the trimaran today and I will probably start on the front one tomorrow. Again, I'll get the camera out for that.
I still get asked to fettle cars and scooters now and again, I still have all my tools but mechanical work is cheap here so most people get things done in town. There is always work to do when you own a boat and I own 4 so there is always work to do. Winter is the busiest time of course because the boats are out of the water and all the ideas that have sprung to mind during the summer, to make them better, can be tackled. They also need to be looked after. Three of my boats are wooden (plywood and fibreglass) and they'll start to look tatty after a busy summer so they get a going over.
I also like making model boats and I currently have 4 on the go. The best thing about the models is that you can put them down for a while and come back to them when there's more time for hobbies. So, I thought I'd document some of the bits and pieces that I do so that you can see that ex-pat life isn't all beer and swimming pools. Here's a couple of finished boats that I made for my grandkids. Most of the models I make though are given away.
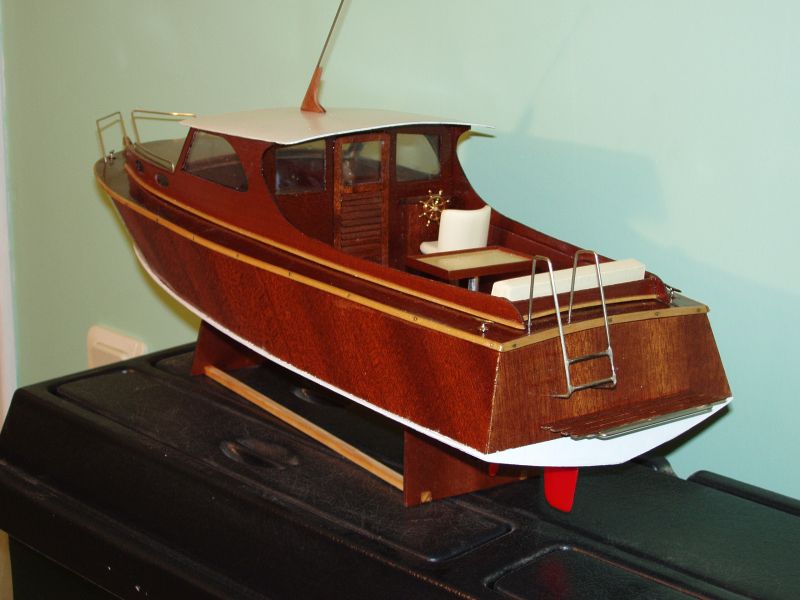
The pink boat is scaled to fit a Barbie doll and my grandaughter usually brings 3 or 4 of them with her when the family come on holiday and gives them trips round the pool.
Current projects are some work on my big boat (although I'm under house arrest so I can't get up to where it's standing to do what I need to do), making new kitchen cupboards and a hard roof over the back end; a bit of re-furb work on the trimaran and 2 RC model boats for friends. I've been making bulkheads for those today and will make some more tomorrow when I'll start taking some pictures. I also sanded the rear aka off the trimaran today and I will probably start on the front one tomorrow. Again, I'll get the camera out for that.
-
- Posts: 3034
- Joined: Mon Mar 16, 2020 9:30 pm
- Location: Less that 50 miles away from Moscow, but which one?
- Has thanked: 1350 times
- Been thanked: 1726 times
Re: In the Shed's Boat Shed.
They are properly good, nice one.
I'd definitely like to see more boat stuff.
I worked on a boat museum the year before last and it was one of the best jobs Ive ever had.
Looking around in the workshop area was an education for me. Curves everywhere.
I'd definitely like to see more boat stuff.
I worked on a boat museum the year before last and it was one of the best jobs Ive ever had.
Looking around in the workshop area was an education for me. Curves everywhere.
-
- Posts: 4909
- Joined: Tue Mar 17, 2020 6:51 am
- Been thanked: 2618 times
Re: In the Shed's Boat Shed.
They're lovely. Not much more to add, other than I'd love a scale half hull as used by shipbuilders for dimensioning.
- Yambo
- Posts: 2470
- Joined: Mon Mar 16, 2020 8:08 pm
- Location: Self Isolating
- Has thanked: 598 times
- Been thanked: 1647 times
Re: In the Shed's Boat Shed.
Make one!
A bit of whittling while you are locked down!
https://www.youtube.com/results?search_ ... del+making
-
- Posts: 4909
- Joined: Tue Mar 17, 2020 6:51 am
- Been thanked: 2618 times
Re: In the Shed's Boat Shed.
You really haven't seen my lack of attention to detail and general patience levels.
- Yambo
- Posts: 2470
- Joined: Mon Mar 16, 2020 8:08 pm
- Location: Self Isolating
- Has thanked: 598 times
- Been thanked: 1647 times
Re: In the Shed's Boat Shed.
There's not a lot I can do for the big boat at the moment, I need to get up to it but not allowed out. I have a cunning plan though for maybe Monday afternoon! In the meantime I've been making bits for two RC sloops and started to re-furb the trimaran akas.
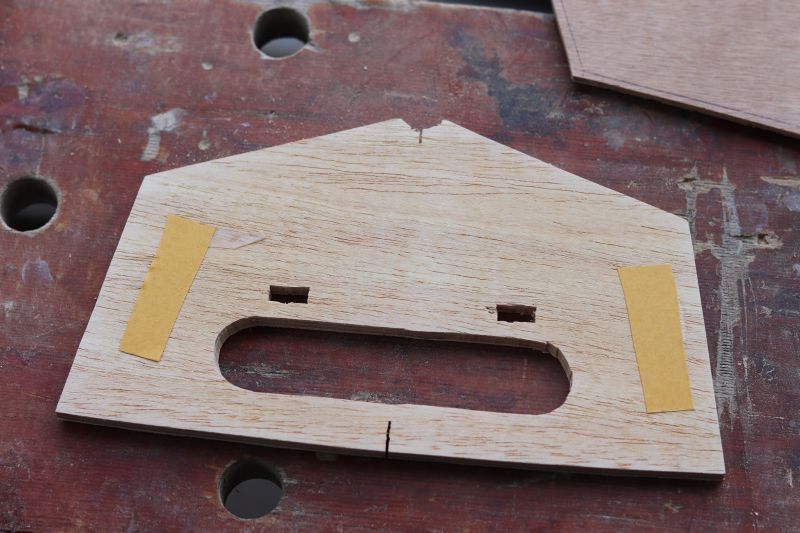
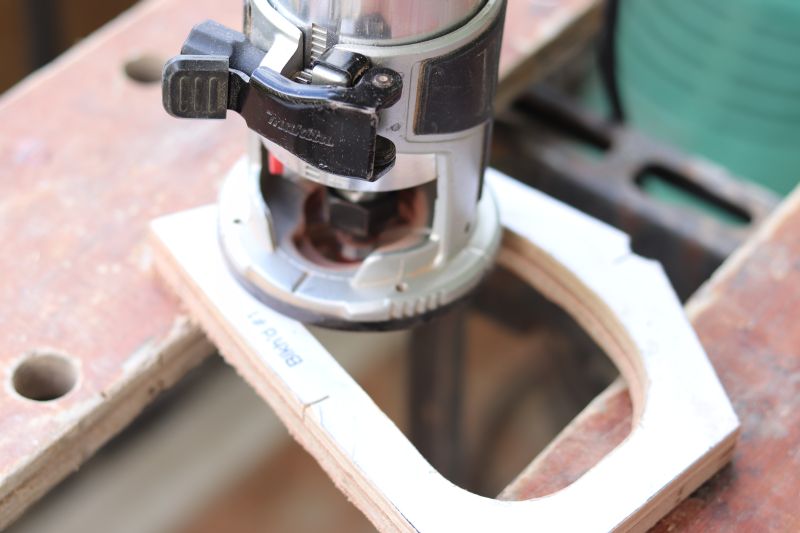
For the sloops I've made the 4 bulheads and made progress on the fin trunk. I'd previously made templates for most of the main parts of the boat so it was simply a matter of cutting bits of ply to just oversize then sticking them to the template with double sided sticky tape.
A profile bit/flush trim bit is the used in the router to follow the shape of the template
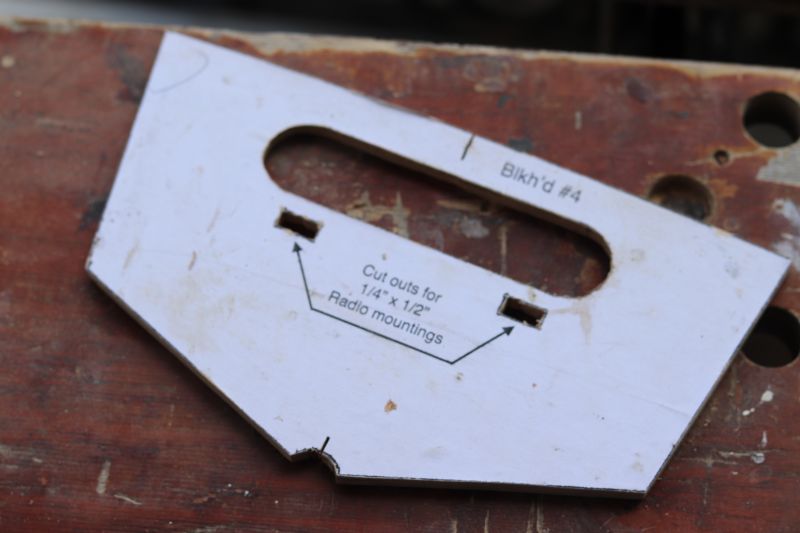
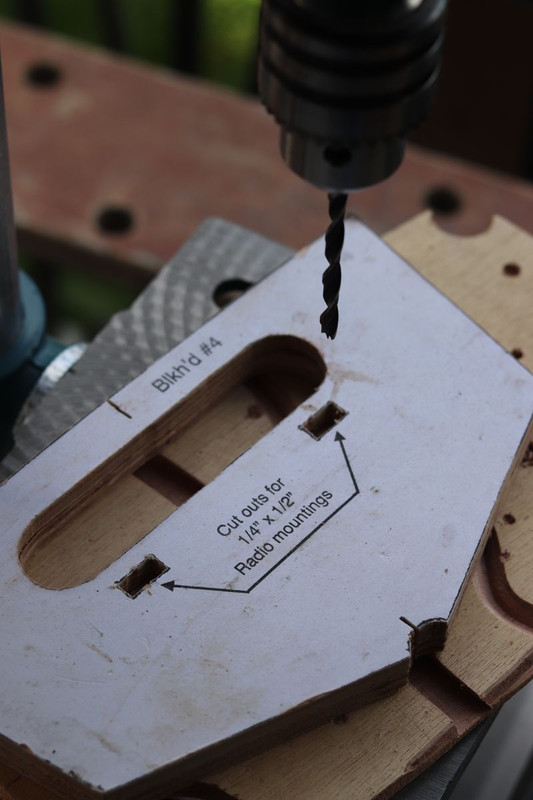
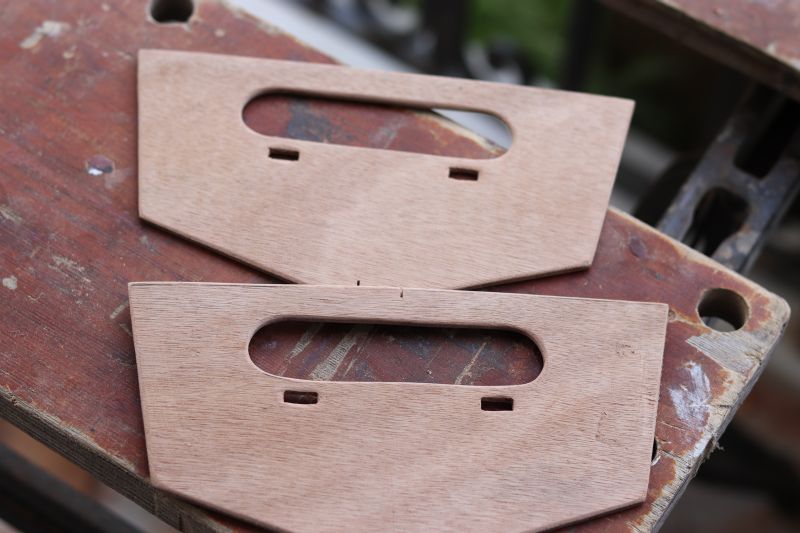
Bulkhead No 4 has two rectangular holes to reproduce. I drill out as much as I can then chisel and file out the rest. I can adjust them later when I have made and need to fit the RC stuff.
The result is a couple of identical (ish ) bulkheads . . .
and then more bulkheads. the rectangular pieces are the sides of the two fin trunks. The fin is part of the keel and will be made out of 3 mm thick aluminium sheet. What will be the inside faces of the fin trunk have been fibreglassed and given a couple of coats of epoxy to make them nice and smooth and waterproof. They just need a light sanding and gluing together with spacers. When the epoxy has dried.
- Yambo
- Posts: 2470
- Joined: Mon Mar 16, 2020 8:08 pm
- Location: Self Isolating
- Has thanked: 598 times
- Been thanked: 1647 times
Re: In the Shed's Boat Shed.
The trimaran (cue gratuitous picture)
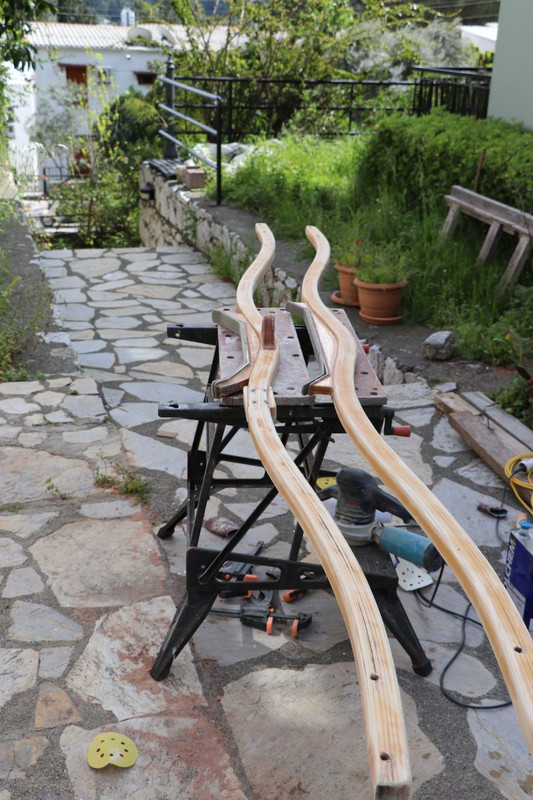
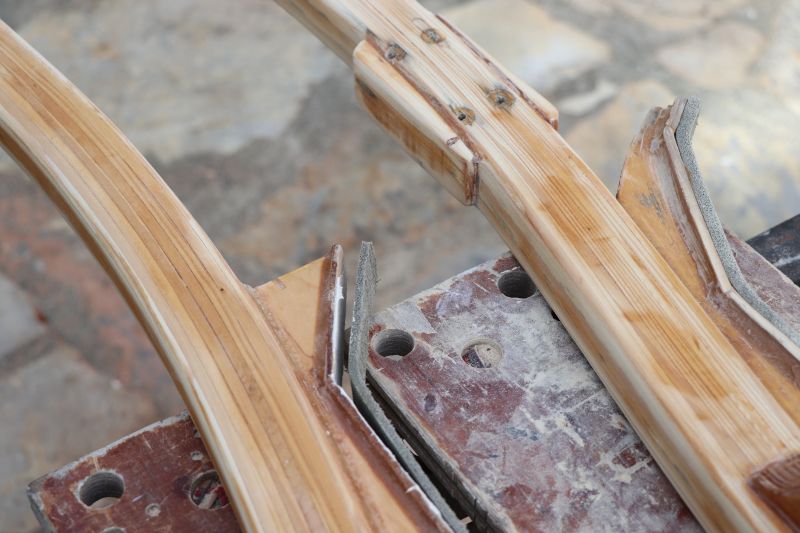
didn't get a lot of use last year and at the moment it looks like it may not get much this year! It's sat on trestles in my garden and the akas, the cross members that hold the outrigger floats were looking a bit jaded. Time to re-furbish them then.
It wasn't difficult. I stripped off all the hardware that is attached to them for sailing and started sanding.A bit of a rub over with hand held 40 grit worked amazingly well and I quickly realised that I probably hadn't given them my customary coat or 2 of epoxy before varnishing them. Some 80 grit on the random orbital sander cleaned them up nicely then I finished off with 120 grit and finally a quick run over with 180 grit. A wash off with acetone and they are ready for whatever I'm going to use to finish them off and hopefully make that finish last longer. Epoxy then varnish; boiled linseed oil, then epoxy to seal and varnish? I don't know - the wood is spruce so I'm leaning towards BLO first.
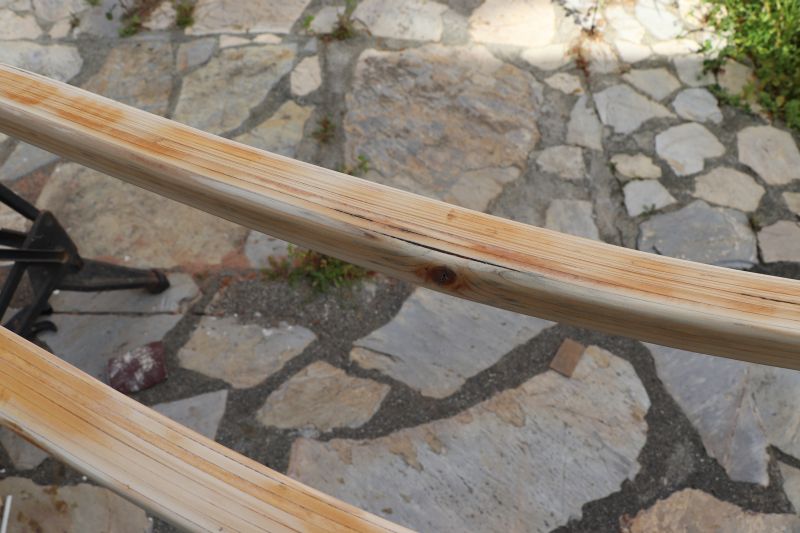
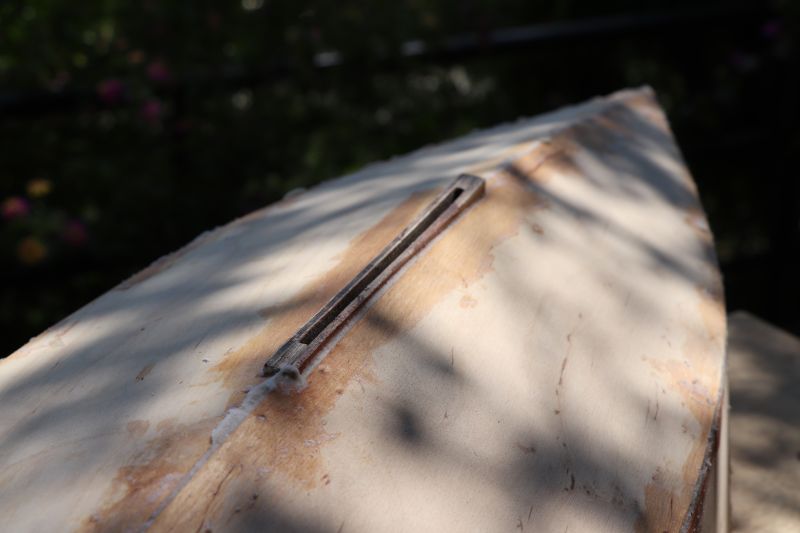
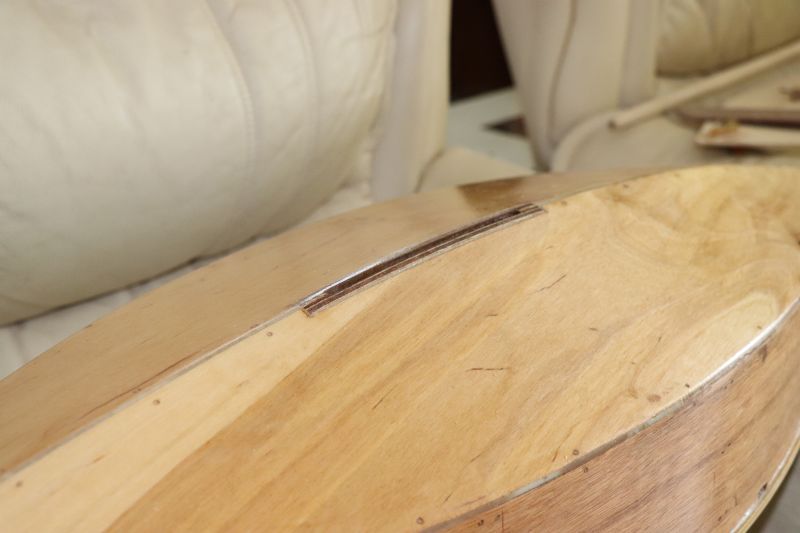
Before I do that though I have a bit of work to do. On the forward aka there is a knot in the wood and I remember deliberately making it an outside piece when I laminated them up as I guessed it might not bend correctly and weaken the interior layers. It seems I was right and it has forced a bit of delamination.
I'm not overly concerned - I'm simply going to fill the crack with some lightly thickened epoxy before I do the finish coats of whatever.
I'll need to re-glue the padding on the hull spacers too. I used silicone when I first fitted them but I've recently found some spray glue which seems pretty good. I'll do a test first of course.
I also need to make a trolley for this boat so that I can get it all down to the beach in one go. At the moment it's about 4 trips as there is the kayak, two outriggers (amas), 2 akas, mast, sail, rudder and leaboard. Oh, and all the ropes and other hardware. I'm trying to think of the best design and design isn't really my thing . . .
-
- Posts: 3034
- Joined: Mon Mar 16, 2020 9:30 pm
- Location: Less that 50 miles away from Moscow, but which one?
- Has thanked: 1350 times
- Been thanked: 1726 times
Re: In the Shed's Boat Shed.
What are you using to thicken the epoxy, sander dust or the bought in stuff?
- Yambo
- Posts: 2470
- Joined: Mon Mar 16, 2020 8:08 pm
- Location: Self Isolating
- Has thanked: 598 times
- Been thanked: 1647 times
Re: In the Shed's Boat Shed.
For this I'll use sander dust, it'll be much the same colour.
I use a variety of fillers depending on the application. The akas were glued up with fibreglass microfibres. They give a strong joint with good shear strength although that wasn't a requirement for the akas. Where weight may be an issue I tend to use a micro-balloons/silica mix and if I want a colour match wood flour/dust from the same source.
-
- Posts: 3034
- Joined: Mon Mar 16, 2020 9:30 pm
- Location: Less that 50 miles away from Moscow, but which one?
- Has thanked: 1350 times
- Been thanked: 1726 times
Re: In the Shed's Boat Shed.
Yambo wrote: ↑Fri Apr 03, 2020 3:52 pm For this I'll use sander dust, it'll be much the same colour.
I use a variety of fillers depending on the application. The akas were glued up with fibreglass microfibres. They give a strong joint with good shear strength although that wasn't a requirement for the akas. Where weight may be an issue I tend to use a micro-balloons/silica mix and if I want a colour match wood flour/dust from the same source.
I read a book about homebuilt aircraft years ago and that mentioned a lot about foam/bidirectional fibreglass/glass microbaloons/resin composites being used to make the wings of Rutan aircraft kits. From memory some of the stuntplane wings using the same technique could hold weights on the wings with the equivalent pressure as 12 Gs so it was could be bloody strong.
Then recently I watched a thing on that Tech Ingredients Youtube channel about him making composites and it was the first I'd heard about being able to just buy sander dust for a filler/thickener.
Think he said that it was graded and very homogeneous so for the quantities he used it made sense to buy it in a big tub.
- Yambo
- Posts: 2470
- Joined: Mon Mar 16, 2020 8:08 pm
- Location: Self Isolating
- Has thanked: 598 times
- Been thanked: 1647 times
Re: In the Shed's Boat Shed.
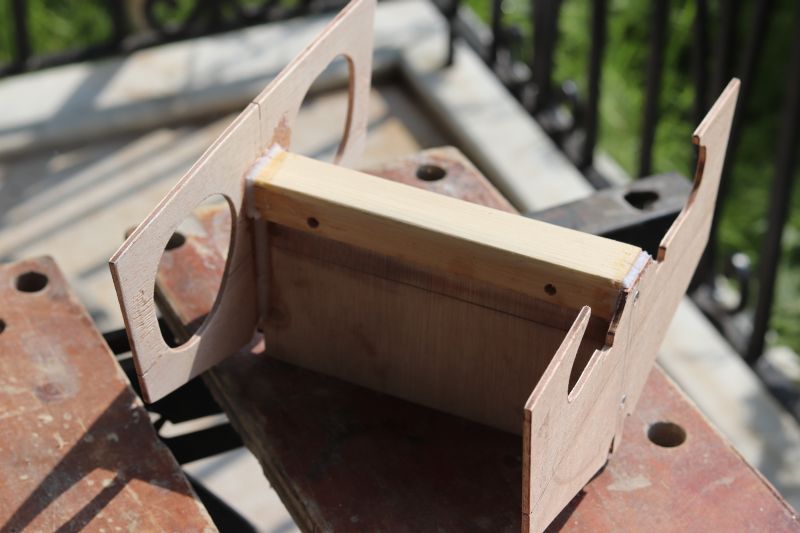
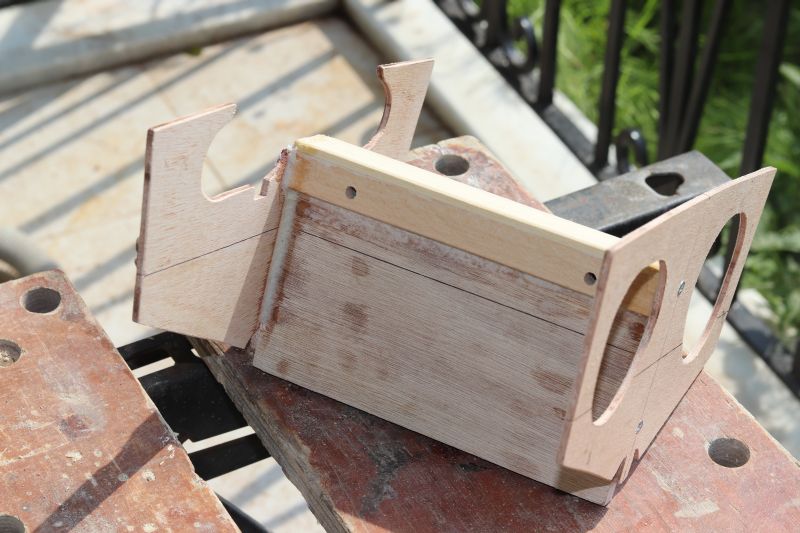
Work on the two RC sloops progresses with the completion of the two fin trunks. These are central to the whole boat so it's worth taking some time and getting them right. The fin trunk is going to hold the keel, which will be made out of 3 mm aluminium sheet with a 3.5 kg lump of lead attached to the bottom of it.
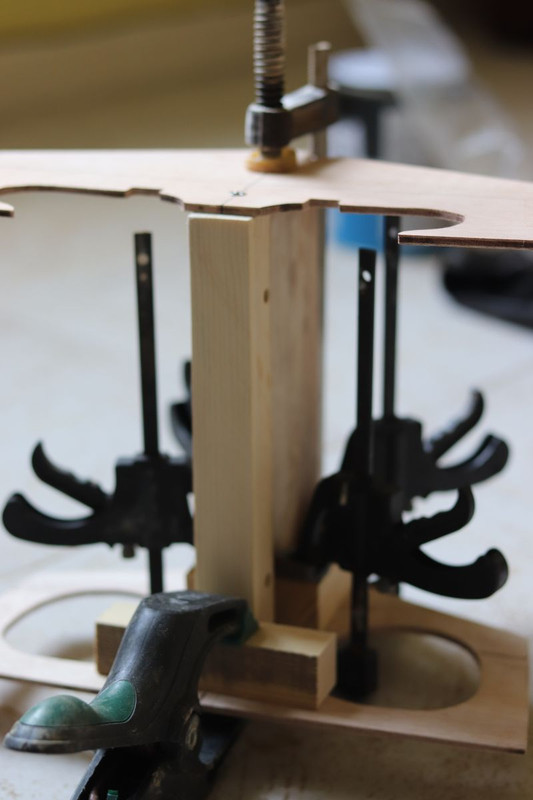
I took a bit of care to make sure the parts were correctly lined up before gluing them - I fitted one bulkhead at a time with some blocks to keep everything in the right place and using 6 clamps to hold it all together. I only realised when I uploaded the photo that I need to work on my focussing a bit more when playing with different lenses!
When they were glued and screwed I put an extra fillet of thickened epoxy along the seams to help strengthen them. The finished fin trunk (there's another one (hopefully identical) of course but I don't want you to get fin trunk overload.
The boat is built around the fin trunk so with them made I can start building the hulls. Time to cut more plywood!
- Yambo
- Posts: 2470
- Joined: Mon Mar 16, 2020 8:08 pm
- Location: Self Isolating
- Has thanked: 598 times
- Been thanked: 1647 times
Re: In the Shed's Boat Shed.
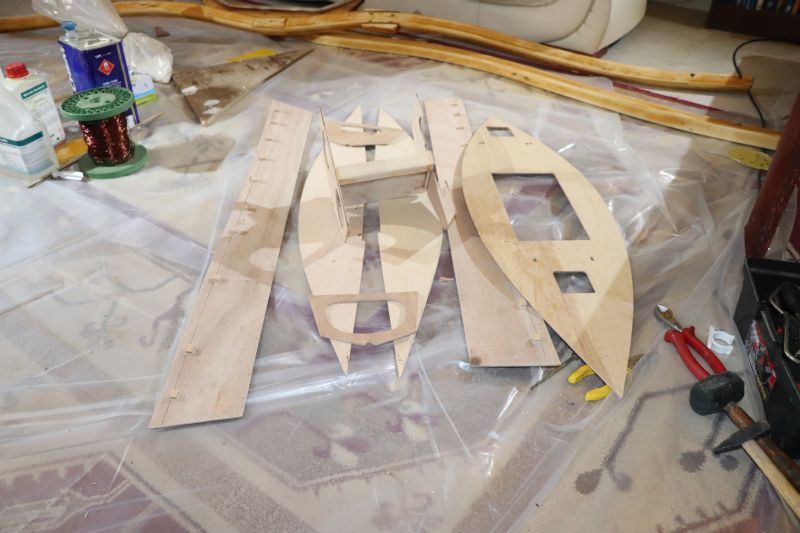
Next to be produced for the two sloops were the hull panels and deck. There are only 4 hull panels, 2 sides and two bottom pieces and as I have templates it was easy to cutout some blanks, stick the template onto one of them with double sided stick tape, add the rest of the pieces, trim round close to the template so the router doesn't have to remove to much then run the router with a profile bit around and voila, identical panels. Both the side panels and bottom pieces have some cut outs, the sides have a hole (a scupper) to let water drain off the deck and the bottom pieces have a recess that fits round the fin trunk.
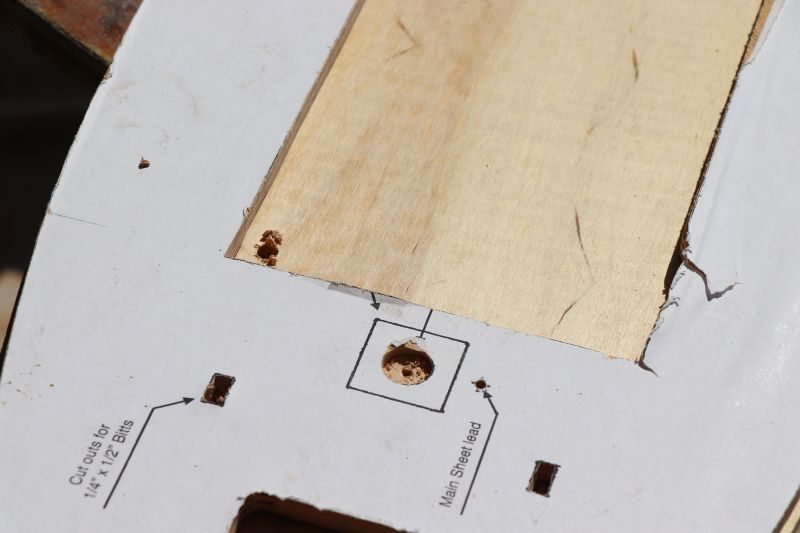
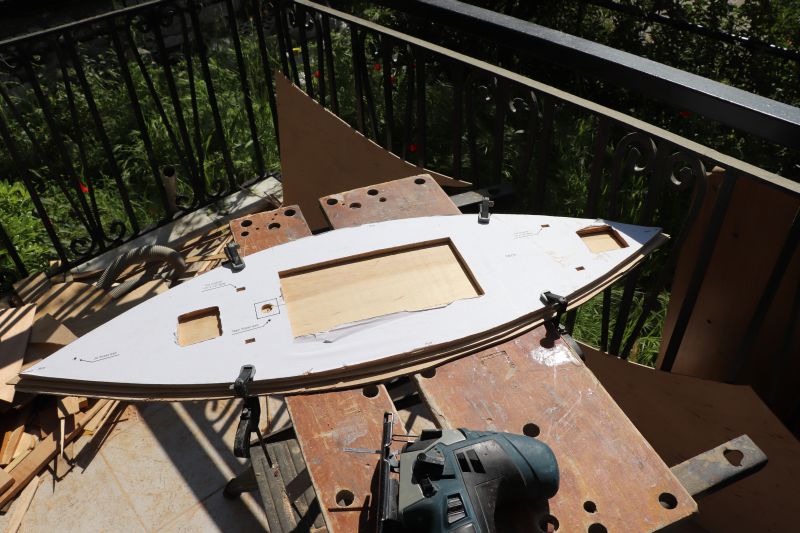
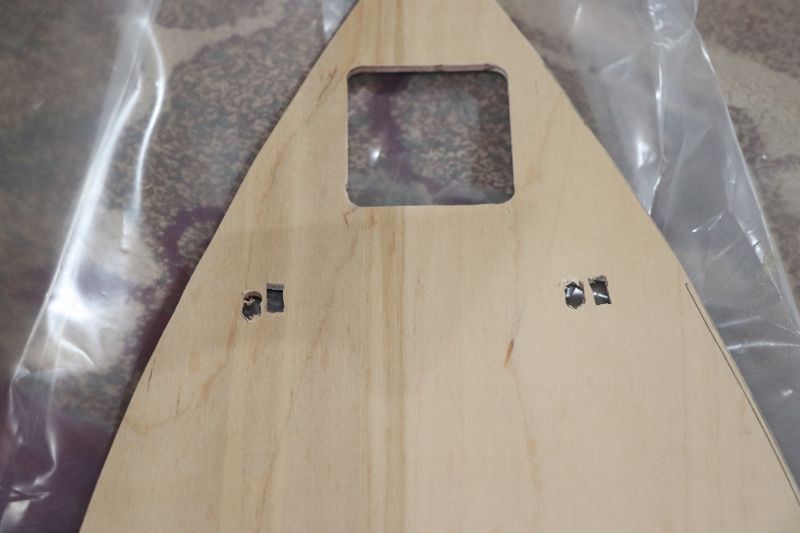
The deck is a bit more complicated with a big cutaway to allow access to the RC kit, 2 hatches, one of them to allow access to the rudder and some small rectangular holes for bitts - protrusions that will hold the travellers. It also needs a hole for the mast (but a 4 mm pilot hole is adequate for that just now) and some holes for where the sheets go through the deck.
More on all that technical stuff later though. I'd made the deck template out of 10 mm ply as that was all I had available that was big enough and it has a bow in it. That wasn't a big problem but turned out to be 'a problem'.
I cut the blanks, stuck all the bits together and started cutting out the holes. These are all rectangular so it's a simple job to cut out some of the excess then line off where the hole is going to go with some thick straight pieces of wood and run the router round the inside. The smaller hatches were fine. I then took a 6 mm drill bit and drilled holes for the forward bitts. The jigsaw with a small blade roughs them out easily. They can be fettled later. Unfortunately, when I drilled out for the aft bitts the template had moved and I only realised when I'd drilled 2 holes in the wrong place. The bow in the template coupled with the plonker putting them together not making sure the surfaces were clean allowed the double side tape to fail. In my defence the sun was very bright and I didn't see that the pieces had slipped and I guess I'm getting just a little pissed off with being under house arrest. Whatever, it is fixable.
I re-stuck everything and drilled the holes where they should be and then cut out and trimmed the big hole. Here's the nearly finished deck
Last thing was to run the profile bit around the outside to produce the final article. That was all the hull panels made (for both boats) but not finished as the side panels need some blocks attaching to support the deck when I come to fitting it later.
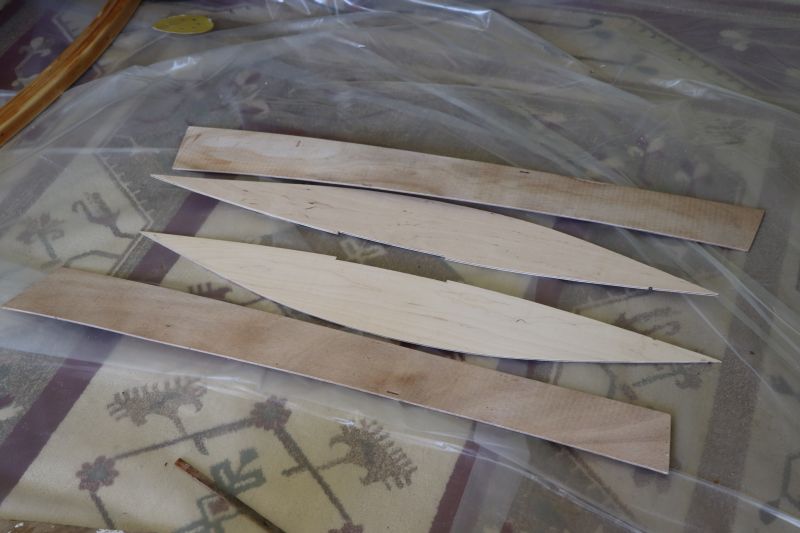
Here are all the panels for one hull:
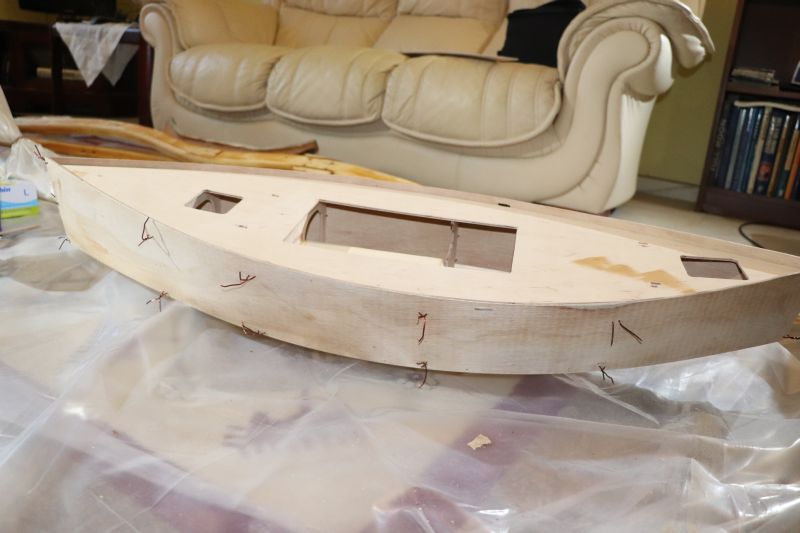
A few bits of copper wire later and we nearly have a complete hull. I do like it when the two dimensional paper plans suddenly become a 3 dimensional thing.
Tomorrow I'll tack glue the bulkheads in place then fit and tack glue the bottom pieces. The deck should keep everything in shape but I'll make sure there are no twists in the hull before the glue hits. The glue will be small dabs of thickened epoxy.
OK, OK I know you want to see them.
- Yambo
- Posts: 2470
- Joined: Mon Mar 16, 2020 8:08 pm
- Location: Self Isolating
- Has thanked: 598 times
- Been thanked: 1647 times
Re: In the Shed's Boat Shed.
Been a busy few days on the balcony and things are getting done.
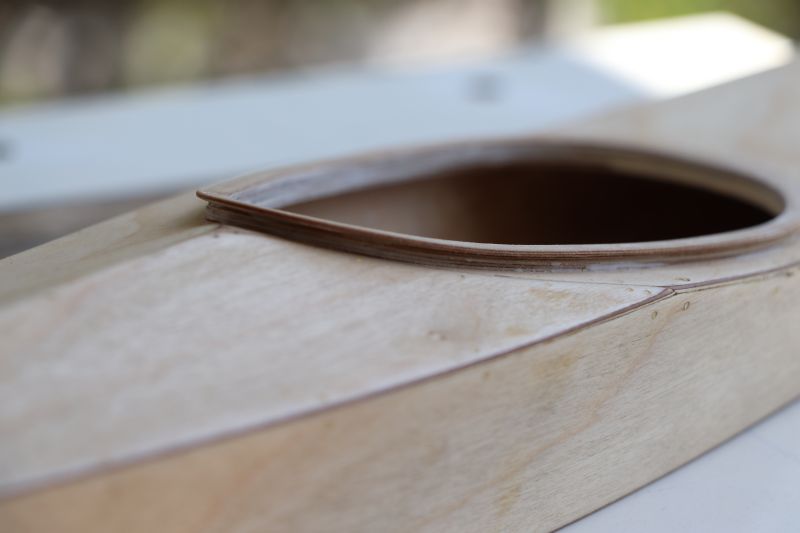
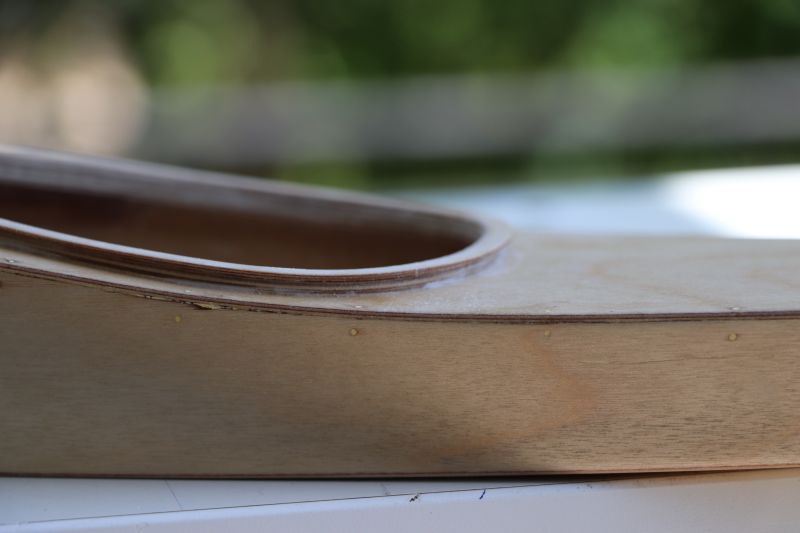
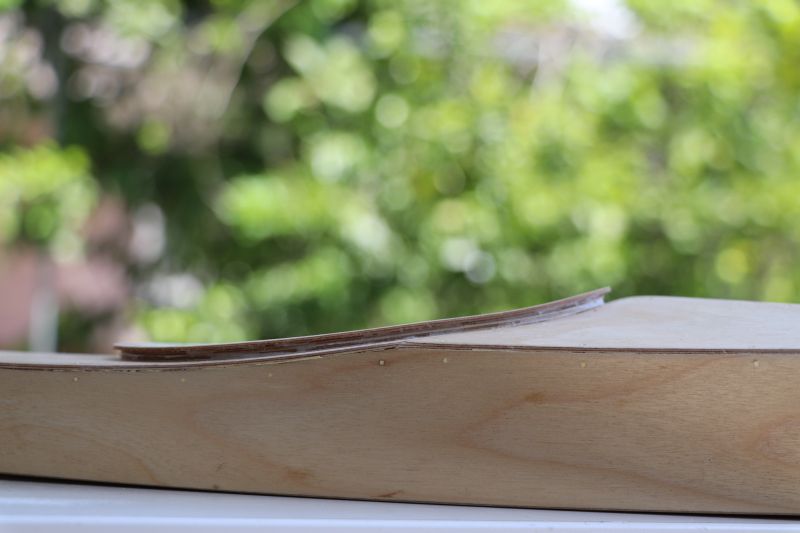
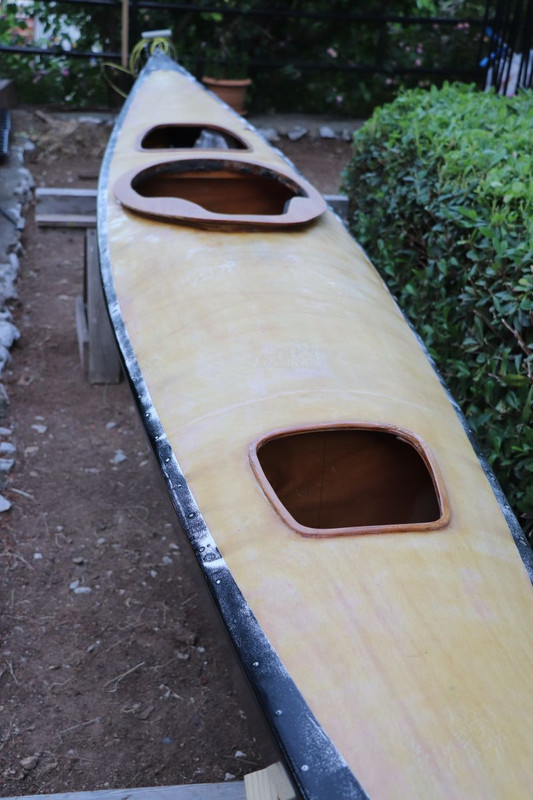
I made and fitted 3 coaming rings for the little kayak, 2 spacer rings and the top ring. These are a little fiddly as the plywood is only 1mm thick and the rings are 3 mm wide and are easily broken (the top ring is 5mm wide) but I have a technique so it's not too difficult. I have the shapes as AutoCad drawings so I print them off, stick them to the plywood and cut them out being reasonably generous. I then cut out the middle with a scroll saw and file to the line with a half round file. Cutting the blanks a bit oversize allows me to put the piece in my small vice and hold it firm. I then cut around the outside with the scroll saw and sand to the line with a belt sander.
They've fitted OK and I now just have to throw on a bit more filler, give it all a light sanding and spray with some undercoat.
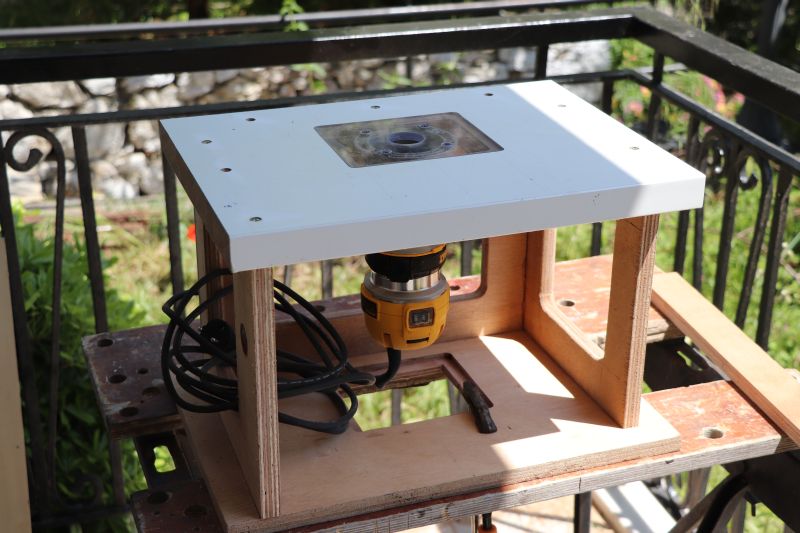
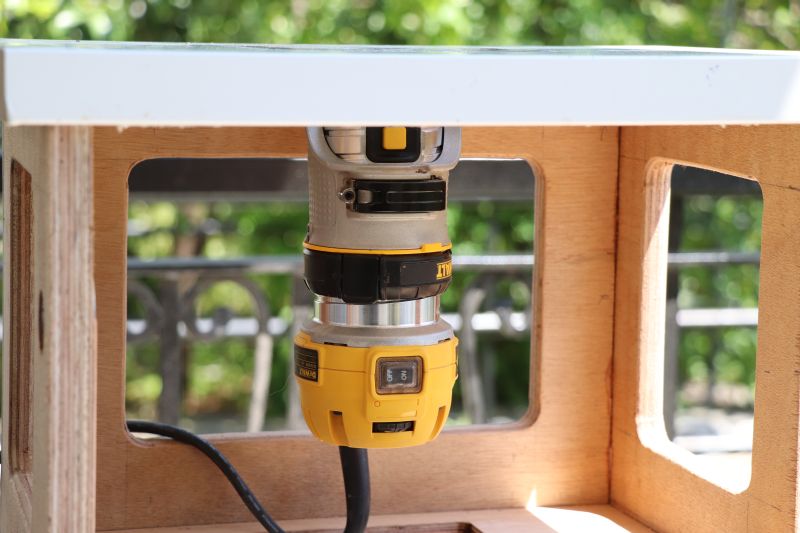
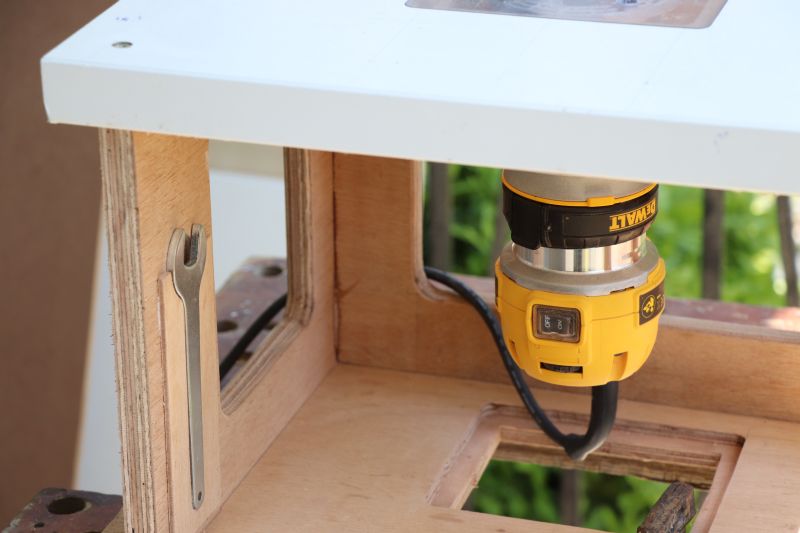
I've also nearly finished the little router table, I just have to make a simple fence with dust extraction capabilities. I was lucky in that a couple of days ago a neighbour threw out a big lump of 32 mm MDF (I think it was a kitchen worktop from the old 60 houses across the road from me. Anyway, it was in fairly good condition and I grabbed it and cut it up. I'd already made a top out of 18 mm plywood but the MDF will be far more stable so the plywood top became a base. The cutout for the router plate allows me to clamp it to my workmate easily. I've based it on free plans from Patrick Sullivan who has a YouTube channel but couldn't be bothered to make his rather fetching dust extraction design. I'll be making one more top for it, a wider, narrower one but this one will be fine for now for a lot of the things I'll use it for.
I've also finished gluing up the two sloop hulls and sanded them to get rid of the excess epoxy. Some photos tomorrow.
I made and fitted 3 coaming rings for the little kayak, 2 spacer rings and the top ring. These are a little fiddly as the plywood is only 1mm thick and the rings are 3 mm wide and are easily broken (the top ring is 5mm wide) but I have a technique so it's not too difficult. I have the shapes as AutoCad drawings so I print them off, stick them to the plywood and cut them out being reasonably generous. I then cut out the middle with a scroll saw and file to the line with a half round file. Cutting the blanks a bit oversize allows me to put the piece in my small vice and hold it firm. I then cut around the outside with the scroll saw and sand to the line with a belt sander.
They've fitted OK and I now just have to throw on a bit more filler, give it all a light sanding and spray with some undercoat.
I've also nearly finished the little router table, I just have to make a simple fence with dust extraction capabilities. I was lucky in that a couple of days ago a neighbour threw out a big lump of 32 mm MDF (I think it was a kitchen worktop from the old 60 houses across the road from me. Anyway, it was in fairly good condition and I grabbed it and cut it up. I'd already made a top out of 18 mm plywood but the MDF will be far more stable so the plywood top became a base. The cutout for the router plate allows me to clamp it to my workmate easily. I've based it on free plans from Patrick Sullivan who has a YouTube channel but couldn't be bothered to make his rather fetching dust extraction design. I'll be making one more top for it, a wider, narrower one but this one will be fine for now for a lot of the things I'll use it for.
I've also finished gluing up the two sloop hulls and sanded them to get rid of the excess epoxy. Some photos tomorrow.
-
- Posts: 3034
- Joined: Mon Mar 16, 2020 9:30 pm
- Location: Less that 50 miles away from Moscow, but which one?
- Has thanked: 1350 times
- Been thanked: 1726 times
Re: In the Shed's Boat Shed.
I've got a half started router table for my Hitachi router.
Got some Incra incramental track for the fence a no volt release switch and so on but I've been putting an old lab worktop and Belfast sink into my wives shed yesterday and today so not had the time yet.
-
- Posts: 942
- Joined: Sun Mar 15, 2020 7:00 pm
- Location: East of West
- Has thanked: 736 times
- Been thanked: 718 times
Re: In the Shed's Boat Shed.
Thanks Yambo, really enjoying your posts. I love all things rc and am attempting to learn how to fly a collective pitch helicopter at the moment. Bloody difficult.Yambo wrote: ↑Thu Apr 23, 2020 7:44 pm Been a busy few days on the balcony and things are getting done.
I made and fitted 3 coaming rings for the little kayak, 2 spacer rings and the top ring. These are a little fiddly as the plywood is only 1mm thick and the rings are 3 mm wide and are easily broken (the top ring is 5mm wide) but I have a technique so it's not too difficult. I have the shapes as AutoCad drawings so I print them off, stick them to the plywood and cut them out being reasonably generous. I then cut out the middle with a scroll saw and file to the line with a half round file. Cutting the blanks a bit oversize allows me to put the piece in my small vice and hold it firm. I then cut around the outside with the scroll saw and sand to the line with a belt sander.
They've fitted OK and I now just have to throw on a bit more filler, give it all a light sanding and spray with some undercoat.
I've also nearly finished the little router table, I just have to make a simple fence with dust extraction capabilities. I was lucky in that a couple of days ago a neighbour threw out a big lump of 32 mm MDF (I think it was a kitchen worktop from the old 60 houses across the road from me. Anyway, it was in fairly good condition and I grabbed it and cut it up. I'd already made a top out of 18 mm plywood but the MDF will be far more stable so the plywood top became a base. The cutout for the router plate allows me to clamp it to my workmate easily. I've based it on free plans from Patrick Sullivan who has a YouTube channel but couldn't be bothered to make his rather fetching dust extraction design. I'll be making one more top for it, a wider, narrower one but this one will be fine for now for a lot of the things I'll use it for.
I've also finished gluing up the two sloop hulls and sanded them to get rid of the excess epoxy. Some photos tomorrow.
- Yambo
- Posts: 2470
- Joined: Mon Mar 16, 2020 8:08 pm
- Location: Self Isolating
- Has thanked: 598 times
- Been thanked: 1647 times
Re: In the Shed's Boat Shed.
OK, I'm back. I haven't really been away anywhere of course as I've been confined to my home since 21 March with a bit of parole on a few Sundays. They have at least allowed me to get a couple of jobs finished on the big boat which is sitting up the back of the village and do my own shopping but were not much of a fillip. While I can do living alone and limited contact with people it has been a bit frustrating not being able to pick and choose who and when I socialise with but I've kept (reasonably) busy and have been pacing myself so I'll always have things to do. A few days ago I moved the kayak down to the side of the house and started refurbing the deck, dry sanding first then wet sanding ready for fresh varnish. I don't think I put enough on when I built the boat and the epoxy underneath seems to have gone a bit yellowish. It could be something different though but whatever, it's going to get at least 8 coats this time. The weather is warming up though so it'll be a coat at 06:00 and another at 19:30.
The sloops are nearly finished, well one of them is but I'm short of materials for the second one and I'm waiting for a delivery from Cornwall model boats - some 16mm beech dowels for masts. I only had one sitting around so I've nearly made one mast which will be finished when the deck of the boat is glued down so I can get measurements spot on. It's very difficult and sometimes impossible to get the supplies you need locally or even on line here. It's getting better but there's a long way to go. Let's have a look at the progress. The hull was all glued up but the fin trunk protrudes from the bottom of the hull so needs to be cut off and sanded smooth.
With that done I applied a couple of coats of epoxy and started on the internals and other bits.
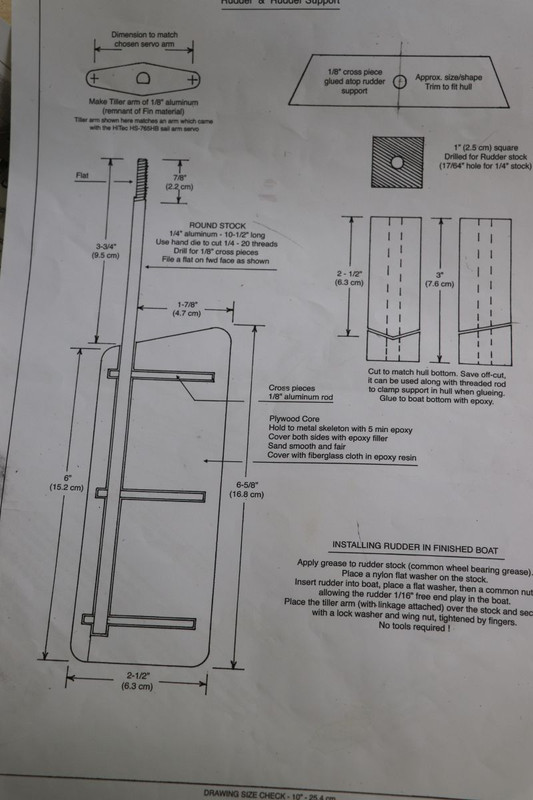
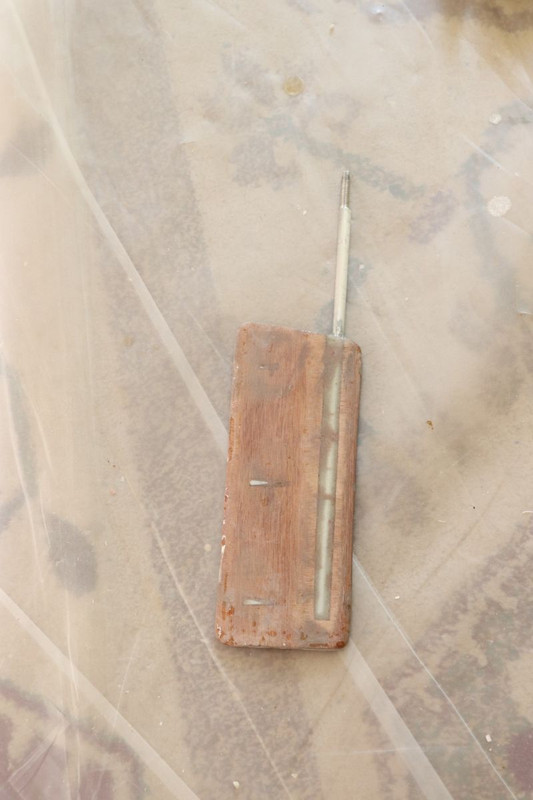
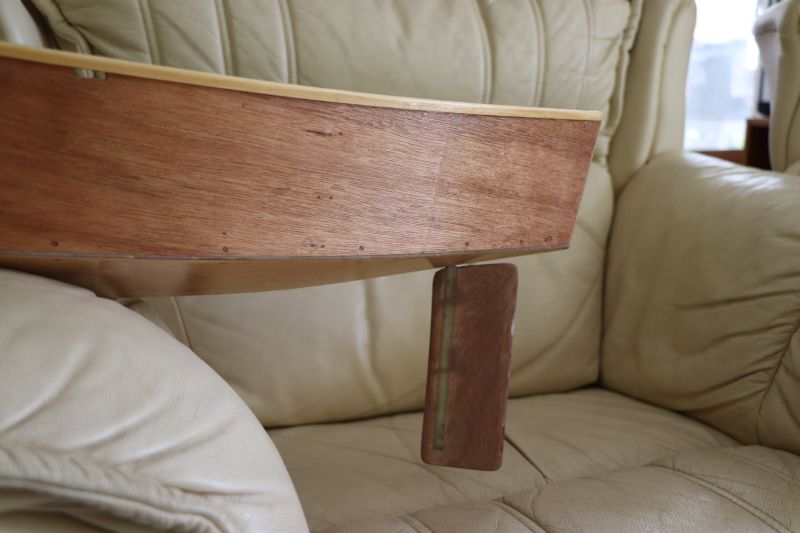
I make the rudder slightly differently to the plans. They say use a bit of the same 3 mm plywood used for the hull etc and shape it with filler. I use a bit of 8 mm plywood and sand it to shape. My way is a bit easier and cheaper - it will always have to be sanded (cos sanding keeps you sane) but its a lot easier to just shape a thicker bit of plywood. The rudder has a 6 mm aluminium rod as a rudder post with 3 x 3mm aluminium rods at right angles to it embedded in the plywood. I didn't take any photos while I was making the pair of rudders but here's a shot of the plans and finished item.
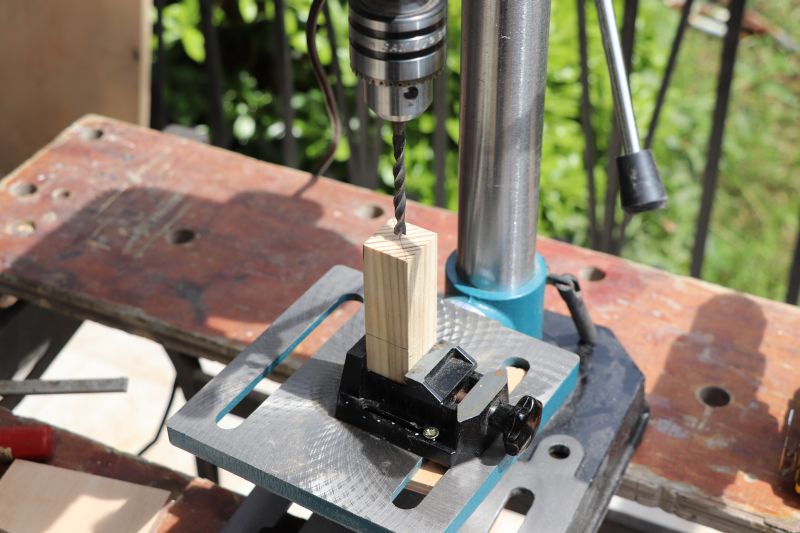
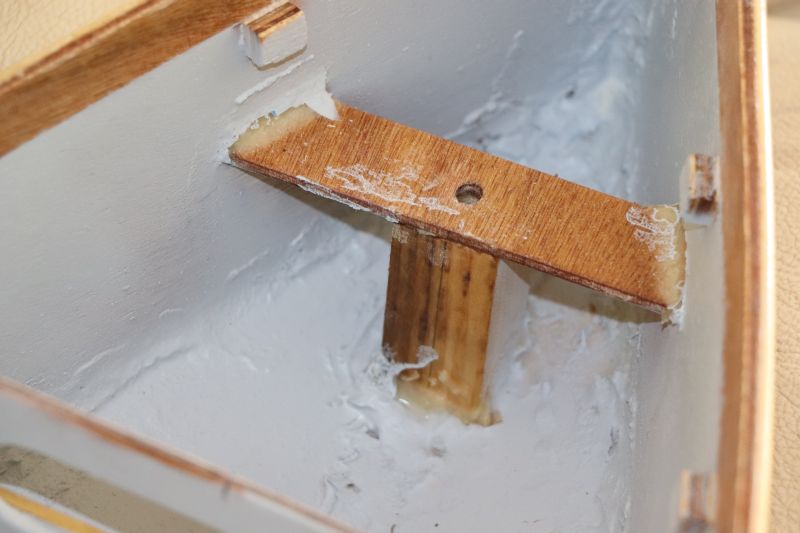
For inside the boat a 25 x 25 mm block is drilled with a 6.4 mm bit and shaped to fit the bottom of the hull and glued in place with a top support.
- Yambo
- Posts: 2470
- Joined: Mon Mar 16, 2020 8:08 pm
- Location: Self Isolating
- Has thanked: 598 times
- Been thanked: 1647 times
Re: In the Shed's Boat Shed.
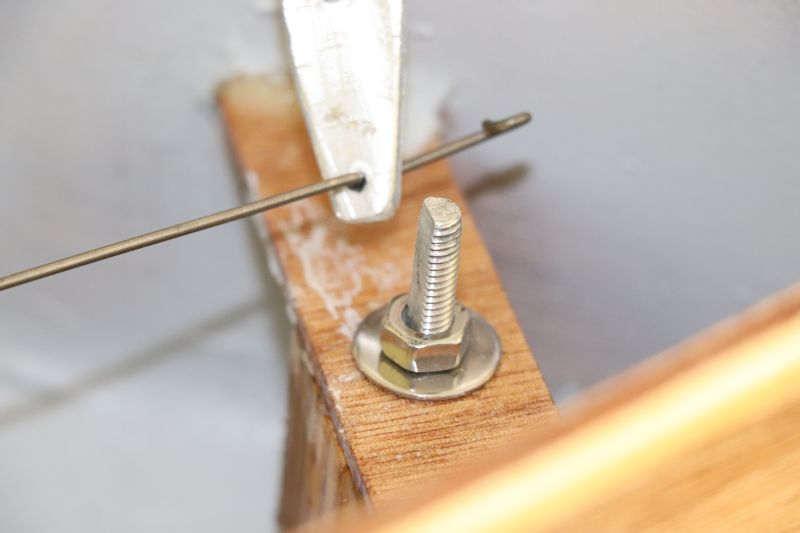
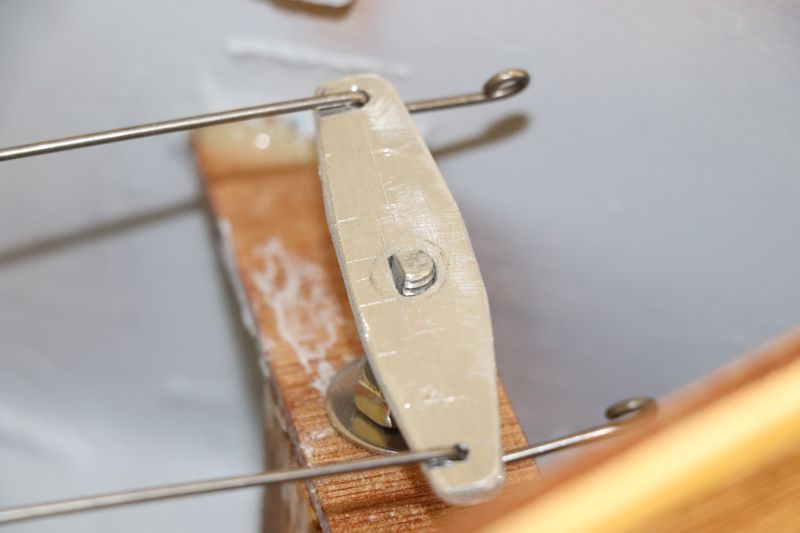
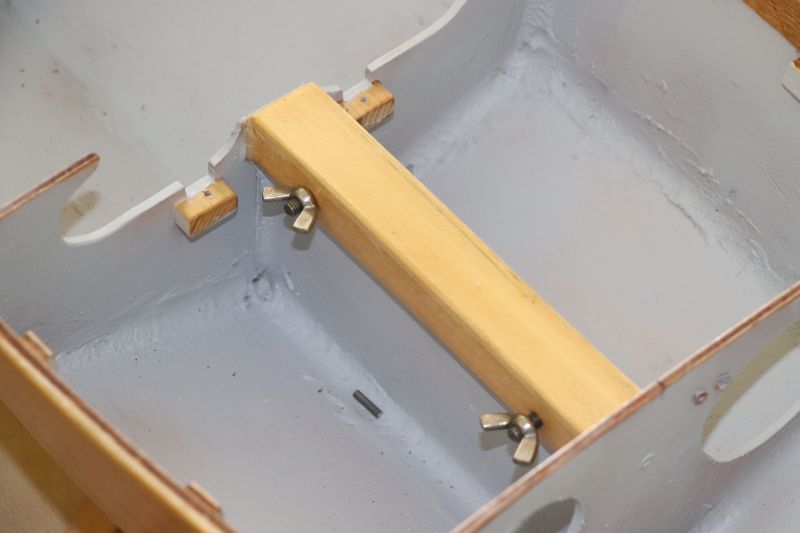
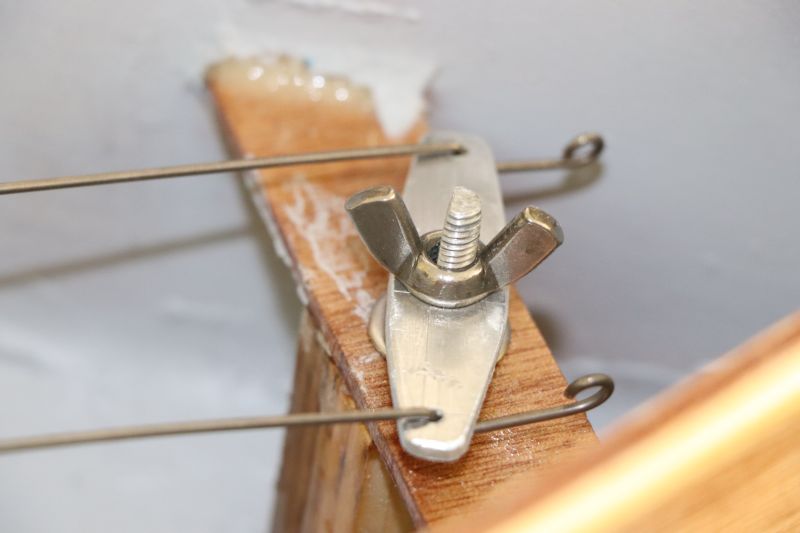
The rudder is slid into the boat from underneath, secured with a washer and nut then the control arm is put on and held in place with a wingnut.
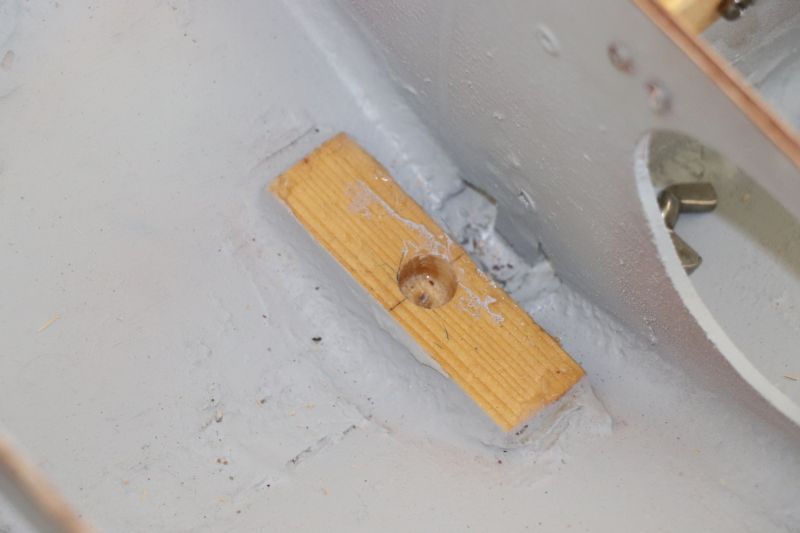
The base of the mast is held in place with a mast step, a block of wood cut to the shape of the hull with a centered, 12 mm flat bottomed hole and like everything else, epoxied in place.
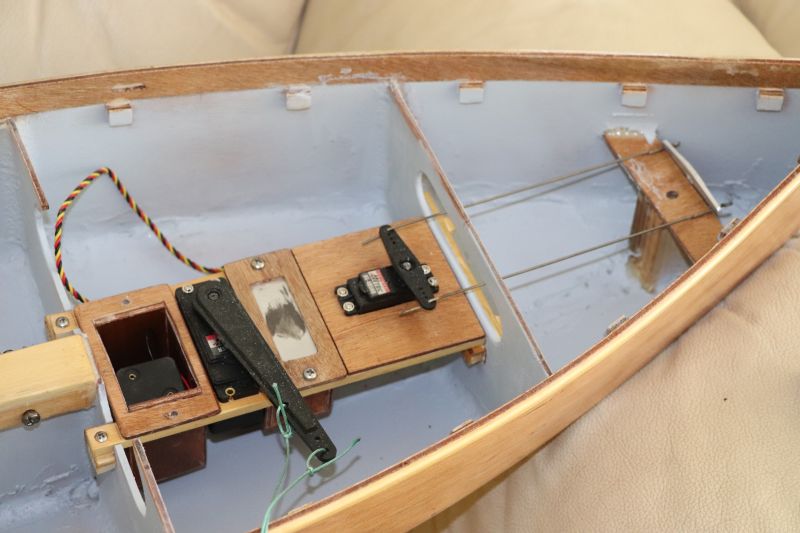
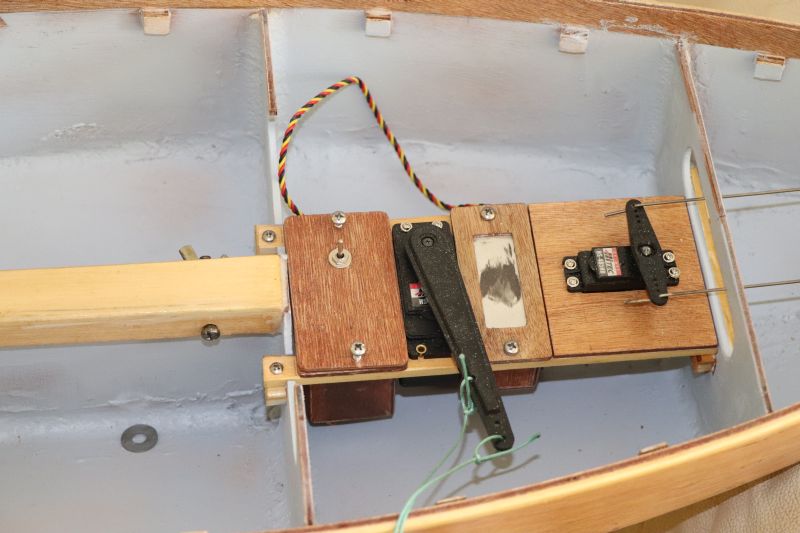
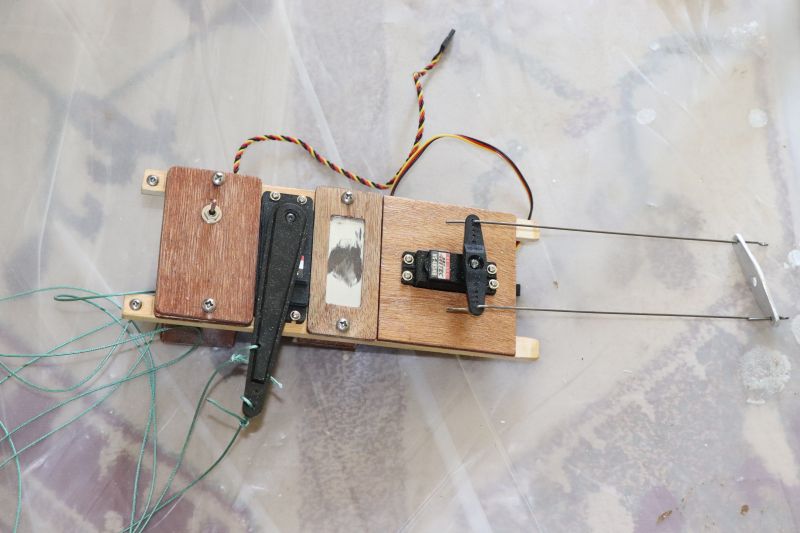
The control gear is fitted to two wooden rails which fit in and on the bulkheads and held in place with two screws.
From the left, battery box, sail servo, RC receiver box (the receivers usually have a led on them which is lit when everything is working so I put a translucent cover on this box so the light can be seen) and rudder servo.
Last, the fin trunk gets two pins to hold the fin in place.
- Yambo
- Posts: 2470
- Joined: Mon Mar 16, 2020 8:08 pm
- Location: Self Isolating
- Has thanked: 598 times
- Been thanked: 1647 times
Re: In the Shed's Boat Shed.
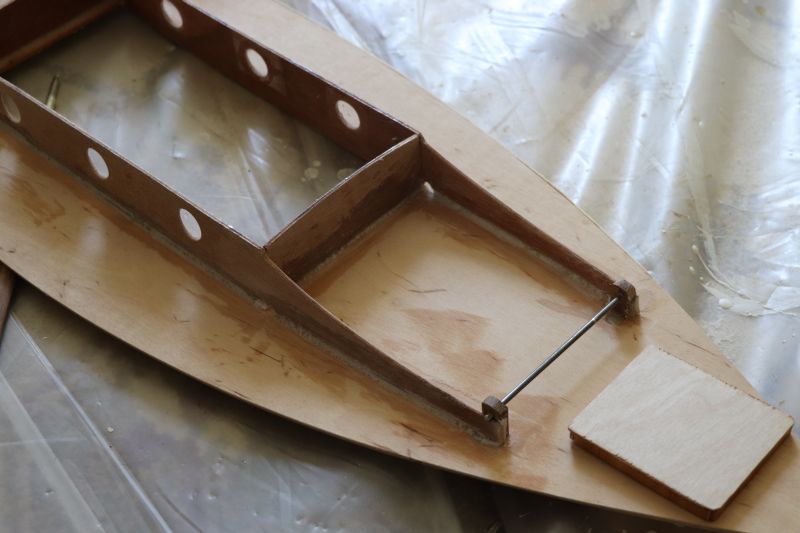
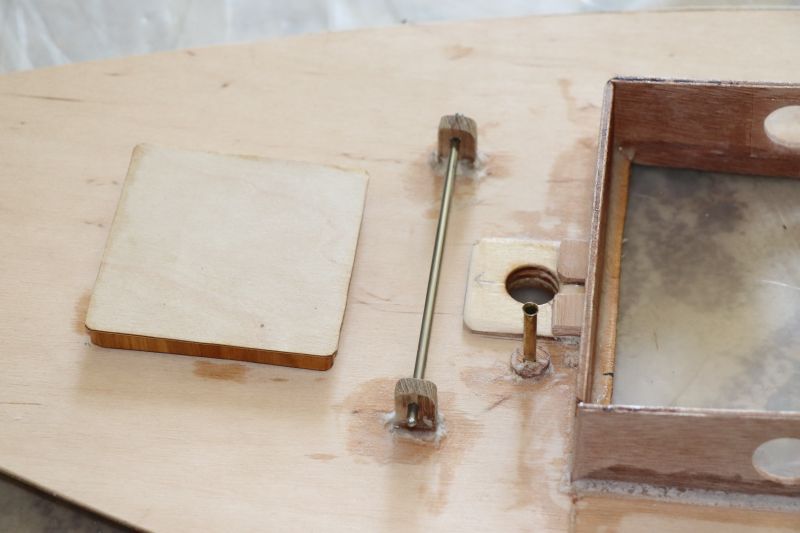
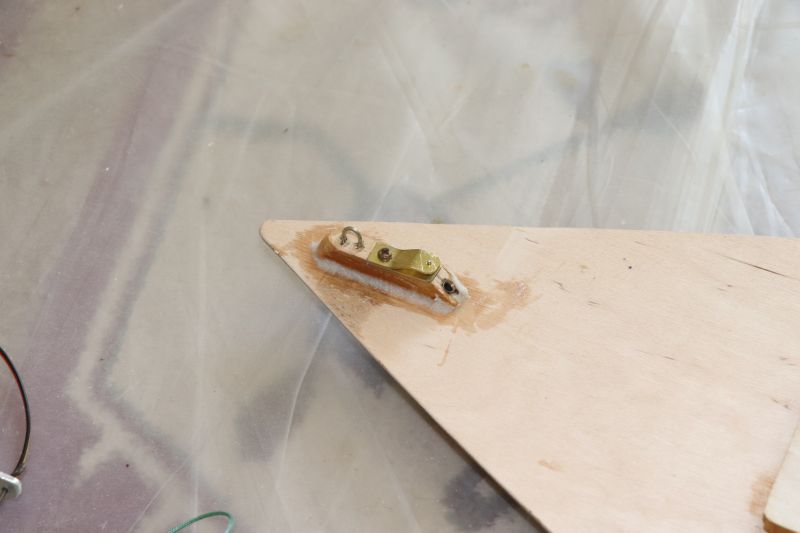
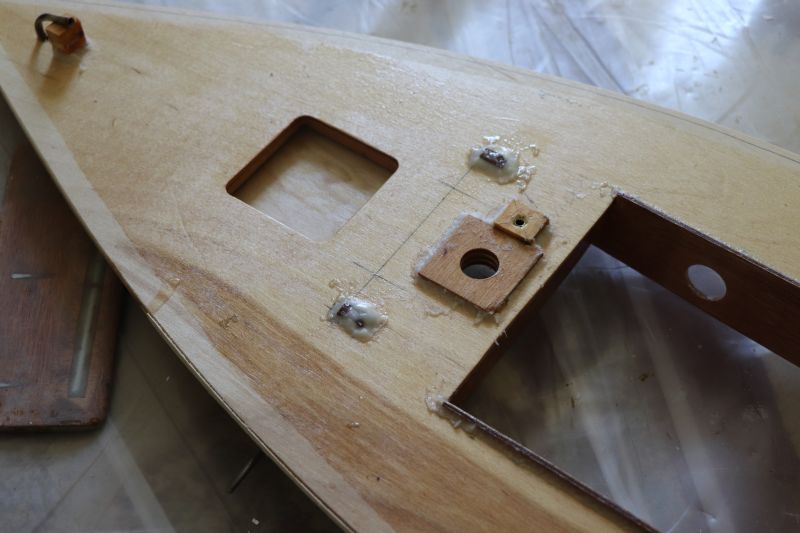
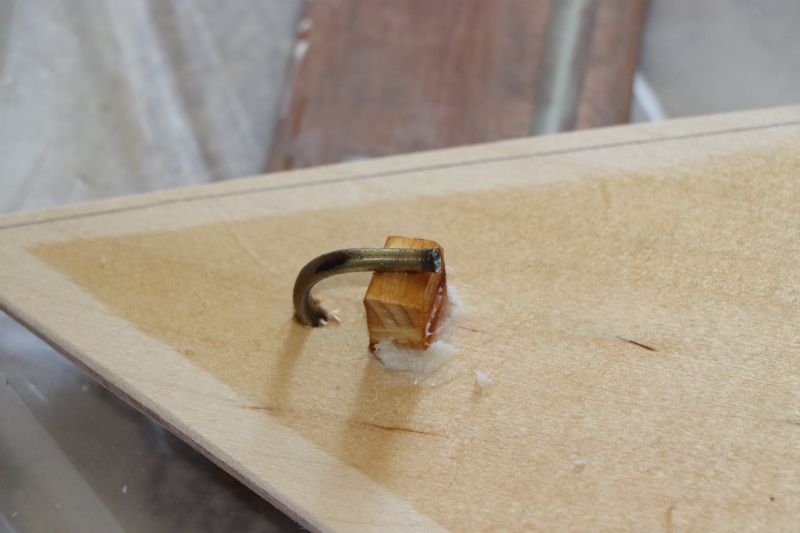
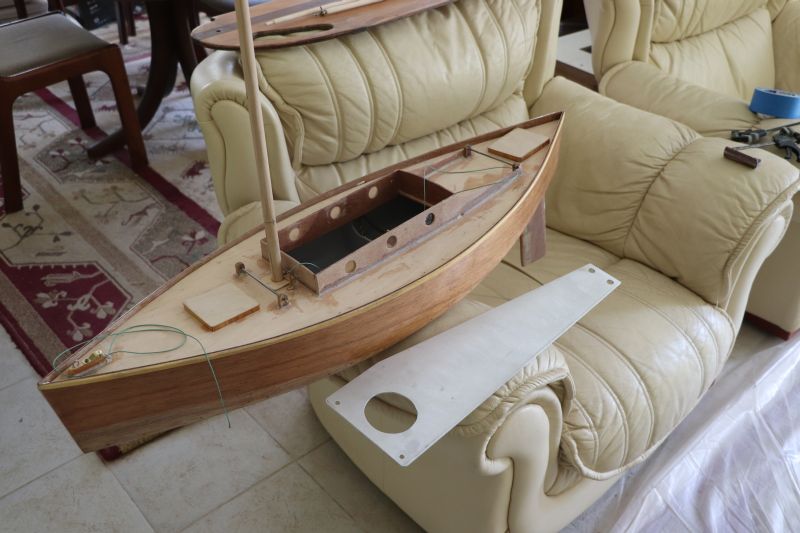
There's a bit of work to do on the deck before it is fitted. The cabin walls have to be made and fitted, 4 bitts are fitted (they hold a steel bar which acts as a traveller, a mast partner to strengthen where the mast goes through, a tube for the mainsheet and a bow piece for attaching the jib and jib boom with a bent tube for the jib sheet to run through smoothly.
Underneath of the deck
I've also made the fin out of 3 mm aluminium sheet and have the lead ready to melt and pour for the bulb but have yet to make a mold. I've also made the mast and spars, just a bit of work to finish on the mast.
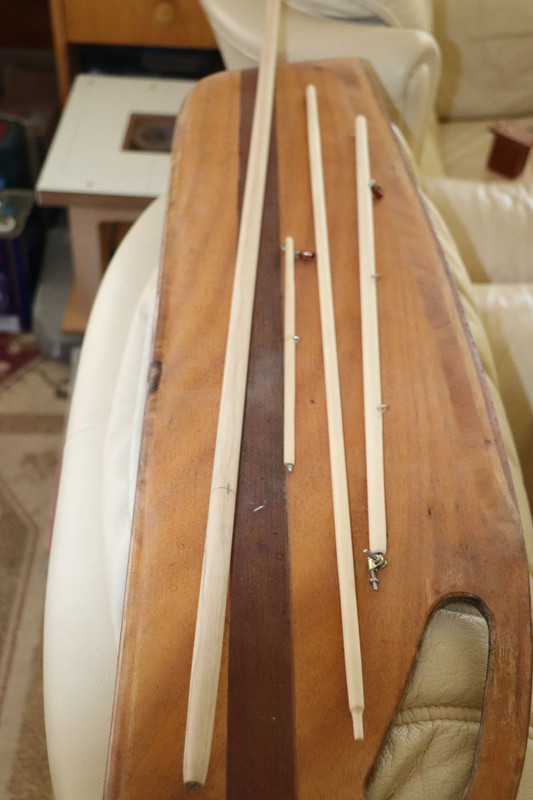
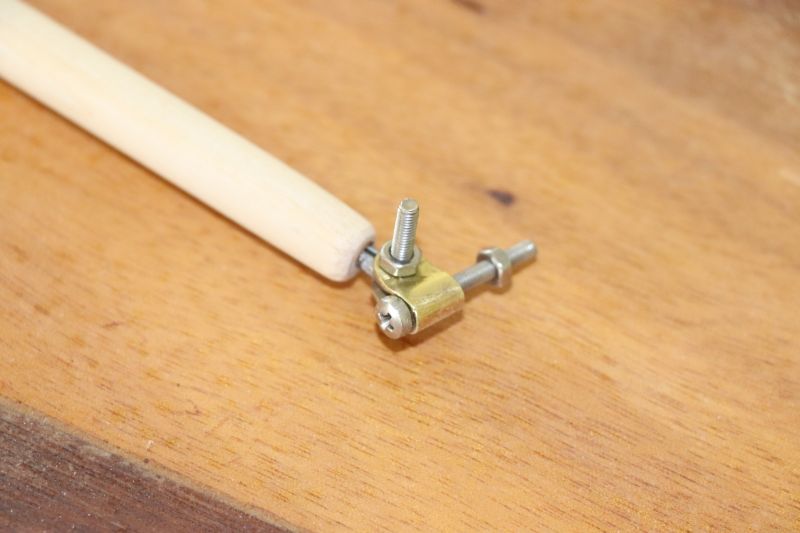
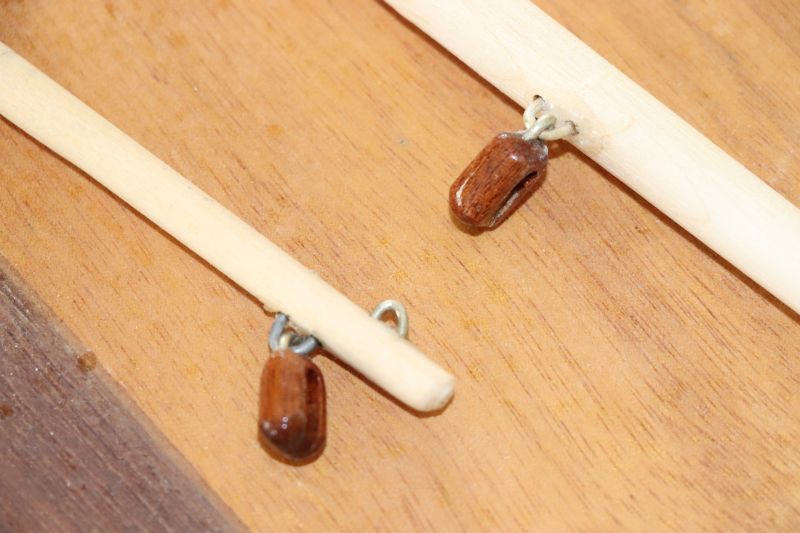
The main boom has a gooseneck which needs to be secured to the mast and both main boom and jib boom have a small home made block for the sheets to run through. The gooseneck is attached to the mast with two stainless steel split pins which is how it is secured to the boom itself. The blocks are made out of a bit of sapele (cheap mahogany) and are surprisingly strong - I test them with a large adjustable spanner which weighs about 700 gms and they cope easily.
With all the internals and deck bits finished the next thing is to secure the deck in place. I'll have to fettle it a bit first so that it's not a tight fit but then it'll be glued to the blocks on the inside of the hull and when that has set up, sealed around the edge with thickened epoxy.
- Yambo
- Posts: 2470
- Joined: Mon Mar 16, 2020 8:08 pm
- Location: Self Isolating
- Has thanked: 598 times
- Been thanked: 1647 times
Re: In the Shed's Boat Shed.
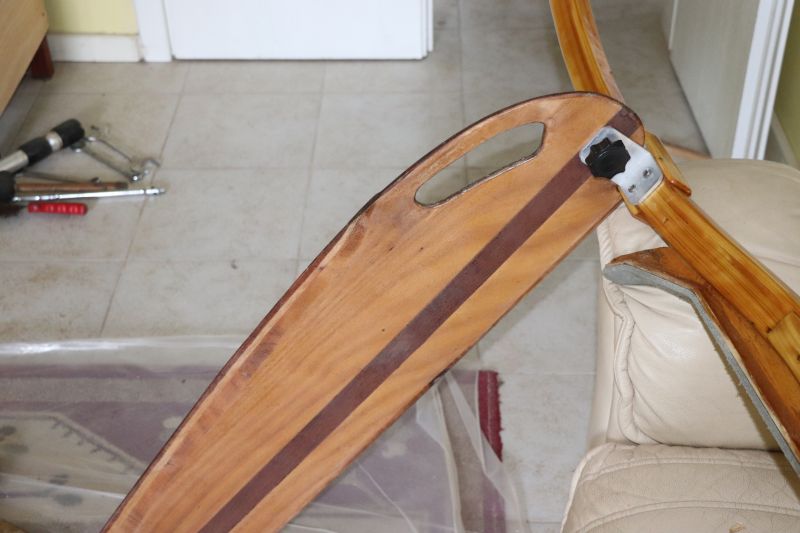
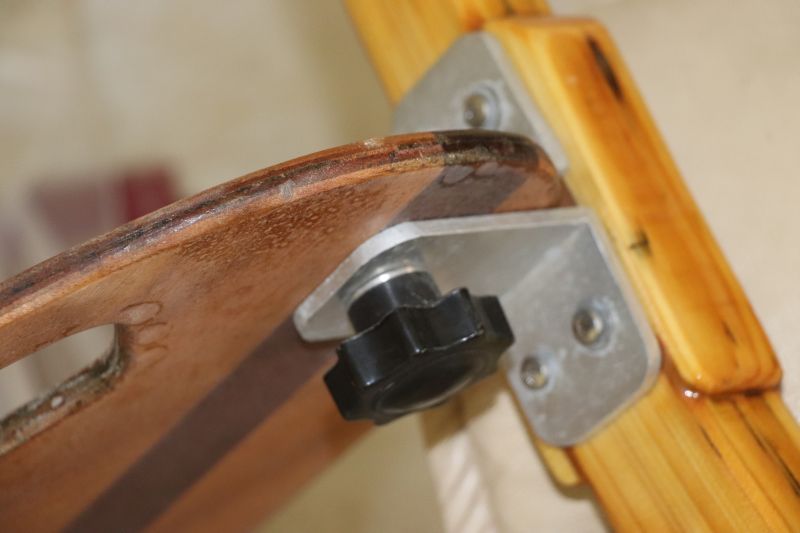
I've been getting on with other jobs as well as models, one of which is refurbing bits of my trimaran. I've never been fully confidant that the leaboard (basically a dagger board but is situated outside the boat so becomes a leaboard) is the best of designs. When deployed, it stops the whole boat from being pushed sideways by the wind. At nearly a metre long it hangs in the water from a single 8 mm bolt and two aluminium right angle brackets.
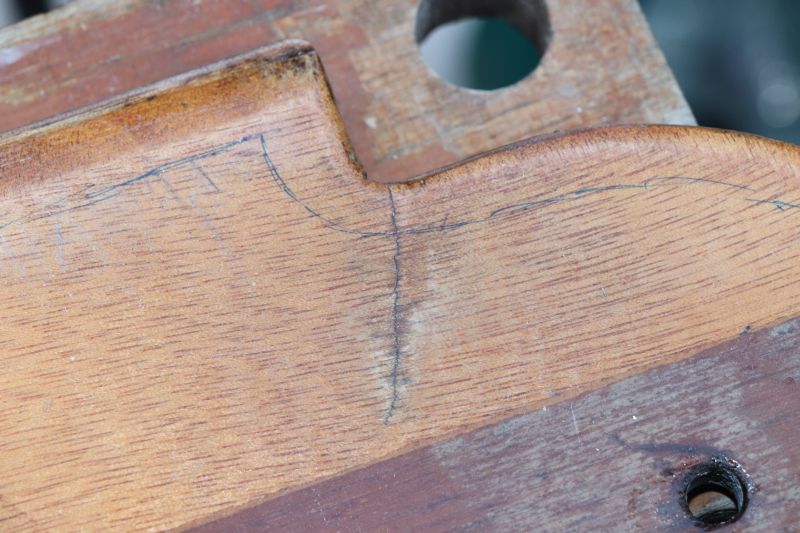
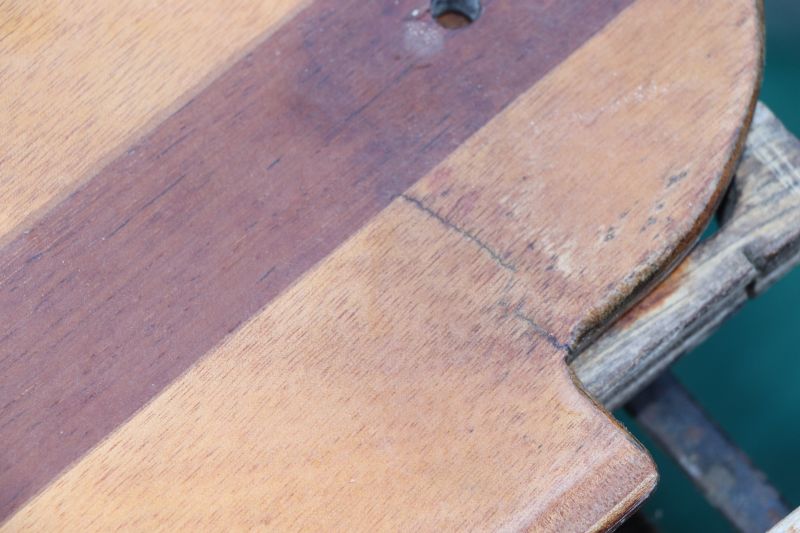
I gave it a clean up and while doing so, noticed that the plywood on the leading edge is cracking.
This is a bit of "oh bollocks!" of course. I don't want to make a new dagger board - the same thing will probably happen so I started thinking of how I could repair it and make it stronger. What I came up with was to put an aluminium plate either side of the leaboard, glued and screwed. I have some 3 mm aluminium sheet from which I'd made the fins for the model sloops so I think it's worth a shot. The plates will be similar in shape to the outline you can hopefully see in this photo
and I've drawn it on AutoCad but it needs a bit of tweaking. When I've got the drawing right, I'll cut the two pieces, then use the router to remove 3 mm thickness of plywood each side, fit the plates and hopefully, Robert's your mother's brother.
I'm also considering getting new mountings made up in town out of stainless steel but what I'd really like to do is fit some sort of bracket to the boat that the leading edge of the board slots into and helps hold it rigid. It's almost certainly sideways movement of the board in the mounting that is causing the plywood to fail. Please continue to watch this space!